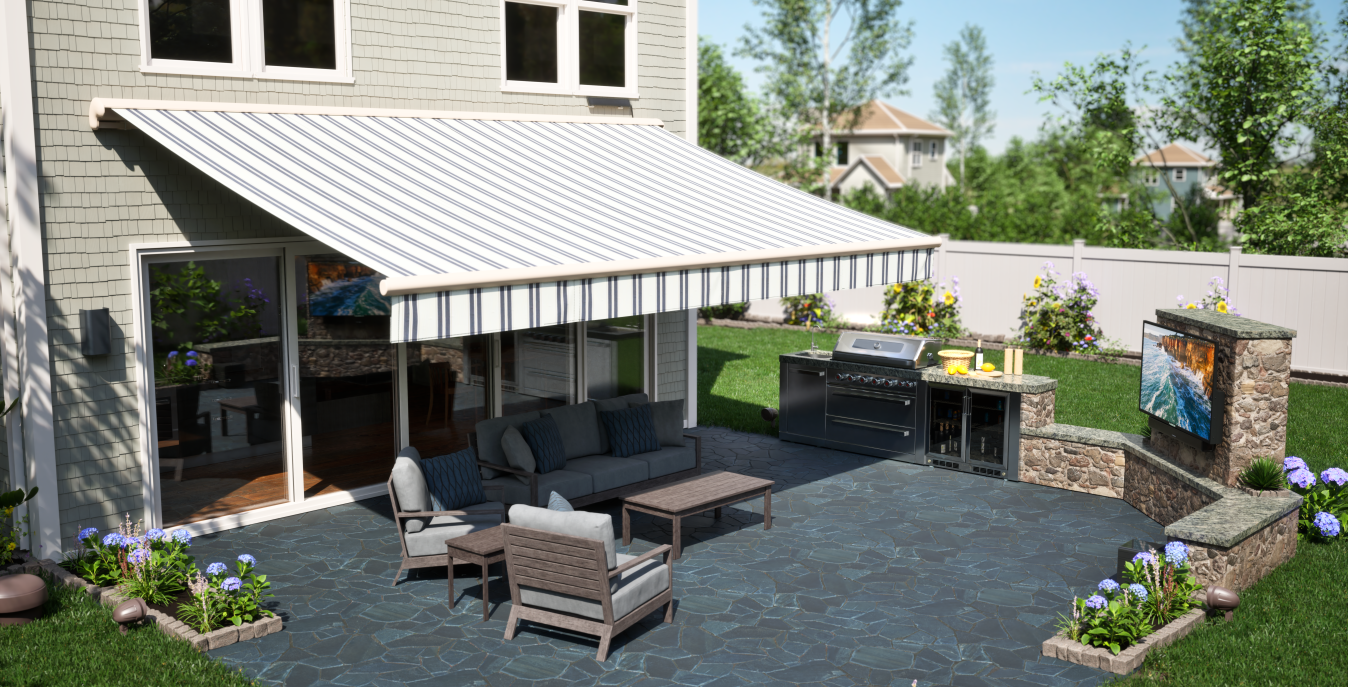
Adding a home awning can transform your outdoor space — creating shade, extending your living area, and boosting curb appeal. But before you can enjoy your upgraded patio or deck, there’s one essential step you can’t skip: getting your awning sizing right.
Getting the correct awning dimensions means making sure your new awning fits your space, functions properly, and complements your home’s exterior. In this guide, we’ll cover everything from wall width and fabric width to mounting height, clearance, and projection, along with extra considerations like foot traffic, existing electrical components, and landscaping. We’ll also share detailed steps for measuring specifically for a Furrion Lumina solar-powered retractable awning.
- Why Awning Sizing Matters
- Key Awning Dimensions to Know
- Step-by-Step Guide to Measuring Your Space
- Special Considerations for a Retractable Awning
- How to Measure for the Furrion Lumina Awning
- Size Chart for Furrion Lumina Models
- Additional Tips & Spatial Considerations
Why Awning Sizing Matters
Proper awning sizing goes beyond picking a model that “looks right.” It involves evaluating your home’s architecture, understanding local environmental factors, and determining how much shade you need at different times of day. An awning that is too wide might interfere with windows or gutters, while one that is too narrow fails to provide adequate coverage. Likewise, incorrect projection can leave gaps in shaded areas or encroach on walkways.
Accurate measurements will help you:
- Maximize shade coverage in the spots you use most
- Prevent interference with existing home features like lighting, siding, or soffits
- Ensure safe installation, particularly for motorized or solar-powered models
- Avoid unnecessary returns or reorders by choosing the right size from the start
Key Awning Dimensions to Know
Before grabbing a tape measure, familiarize yourself with these core terms:
Awning Width
The total horizontal distance the awning covers when mounted on your wall, including the awning arms. This measurement dictates how much of your home’s façade the awning spans.
Fabric Width
The actual width of the fabric panel, which may be slightly narrower than the awning width due to end caps, brackets, and roller tube hardware.
Projection
How far the awning juts out from the wall when fully extended. Projections usually range from 7-10 ft. for residential models, but certain brands offer shorter or longer options. Projection determines the size of the shaded area.
Mounting Height
The vertical distance from ground level to where the awning brackets will be attached. This affects the angle of shade, headroom beneath the awning, and ease of use.
Clearance Height
The unobstructed space directly below the mounting point. Some awnings need extra clearance for arms or motors to deploy fully without hitting windows, doors, or fixtures.
Solar Panel or Motor Location (for motorized or solar models)
Placement of the power source can affect where you locate the awning. A solar panel might need a sunny, unobstructed area while a motor may require proximity to an outlet or wiring.

Step-by-Step Guide to Measuring Your Space for a Home Awning
Follow these steps to capture every necessary measurement for your new awning:
1. Measure Your Wall’s Available Width
- Identify the exact portion of the wall where you want to mount the awning.
- Use a measuring tape to find the total horizontal space. Record this as your maximum possible awning width.
- Leave at least two to three inches of wiggle room on each side in case there are slight variations in wall surface or mounting hardware width.
2. Verify the Fabric Width Requirements
- Check the manufacturer’s specifications to determine the actual fabric width of your chosen model.
- Subtract any bracket or end cap dimensions from the total awning width to ensure the fabric itself won’t rub against siding, trim, or windows.
3. Measure the Desired Projection
- Decide how far you want the awning to extend outward. Typical projections include 7, 8, 9, 10, or 12 ft.
- Using a tape measure or chalk, mark the projection distance on the ground at several points to outline your shaded footprint.
- Walk through this area at different times of day to see if it obstructs pathways, garden beds, or furniture placement.
4. Determine the Mounting Height
- Measure from the ground to the point on the wall where the upper brackets will attach.
- Consult your chosen awning’s manual for minimum height requirements — generally 7 ft. or higher to allow for walking space and proper arm deployment.
- Consider mounting a bit higher (for example, 8-9 ft.) if you have tall doors, sliding doors, or want a steeper angle to block afternoon sun.
5. Check for Vertical Clearance Below the Mounting Point
- Ensure there is enough space directly under where the brackets will be installed. Some models require a minimum of 9 in. of clearance for the awning’s arms or motor housing to slide in and out without obstruction.
- Look for anything mounted on the wall — light fixtures, shutters, vents, etc. — that could interfere with the awning’s movement.
6. Scan for Obstructions & Existing Features
- Inspect the wall and surrounding area for potential conflicts:
- Gutters and downspouts (could bump the awning when reclosing)
- Outdoor lighting or security cameras (may need relocation)
- Electrical outlets or wiring (important for motorized awnings)
- Roofline overhangs (might reduce available mounting height)
- Note any foot traffic or vehicle pathways at the edge of the projection zone. An awning too low or too deep could interfere with normal movement.
7. Assess Wall Material & Structural Support
- Confirm your wall surface — brick, stone, stucco, wood siding, or vinyl — can handle the weight and torque of an awning.
- If you have vinyl or wood siding, you may need extra reinforcements like backing plates inside the wall to spread the load.
- For masonry or brick, use appropriate anchors and drill bits designed for solid surfaces.

Special Considerations for a Retractable Awning
Many homeowners prefer a retractable awning because it can be extended or retracted based on weather conditions, sunlight, or seasonal use. When sizing a retractable awning, keep these factors in mind:
- Ease of Use: Make sure the awning can be fully retracted without brushing against gutters or hanging objects.
- Wind and Weather: Ensure there is enough clearance to manually retract or use a motor in case of sudden storms. Some retractable models come with wind sensors that automatically retract the fabric.
- Mounting Angle: Retractable awnings often allow pitch adjustment. Factor in how much tilt you want to shed rainwater or maintain optimum sun coverage.
- Fabric Replacement: Over time, you may replace just the awning fabric. Verify that your measurement will accommodate future fabric swaps without extra modifications.
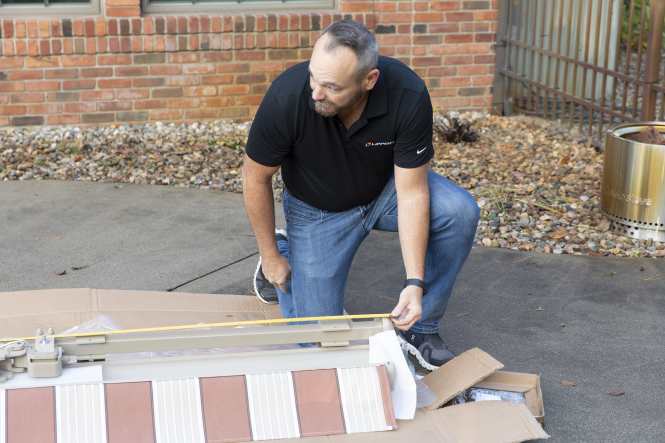
How to Measure for the Furrion Lumina Awning
The Furrion Lumina solar-powered retractable awning offers a sleek look, quiet operation, and ultimate convenience. Follow these exact steps to measure for a Furrion Lumina:
1. Measure the Wall for Mounting Height
- Minimum Height Required: 7 ft. 6 in. from the ground to the mounting surface.
- Optimal Height: 9 ft. This height provides ideal pitch, maximizes headroom beneath, and helps clear most structures.
2. Measure the Wall for Awning Width
- Select the Furrion Lumina model that best fits your available awning width. Options include 12, 14, 16, 18, and 20 ft. widths.
- Allow at least 3 in. of buffer on each side to accommodate bracket end caps without risk of rubbing the siding.
3. Ensure 9 in. of Unobstructed Space Below Mounting Height
- Check for any wall-mounted items (outlets, lights, vents) directly under the planned mounting point. Move or adjust them if they intrude into this 9-inch zone.
4. Determine Solar Panel Location for Optimal Sun Exposure
- The Lumina’s solar panel measures 24-1/2" L x 3" W x 1-1/2" H. It connects to the motor housing via a pre-wired cable.
- Position the panel within 8 ft. of the motor, pre-installed on the right side of the awning head.
- Mount on a south-facing or west-facing wall free from shade for most of the day to maximize solar charging efficiency.

Size Chart for Furrion Lumina Models
Below is a quick reference table outlining the various Furrion Lumina awning size options, corresponding projections, and mounting heights:
|
Awning Width |
Projection |
Mounting Height (Min.) |
Mounting Height (Optimal) |
|
12 ft. |
10 ft. |
7 ft. 6 in. |
9 ft. |
|
14 ft. |
12 ft. |
7 ft. 6 in. |
9 ft. |
|
16 ft. |
12 ft. |
7 ft. 6 in. |
9 ft. |
|
18 ft. |
12 ft. |
7 ft. 6 in. |
9 ft. |
|
20 ft. |
12 ft. |
7 ft. 6 in. |
9 ft. |
Note: All Lumina widths require 9 inches of unobstructed space below the mounting height for proper deployment.
Additional Tips & Spatial Considerations
In addition to measurements, keep these practical considerations in mind when finalizing your awning sizing:
-
Obstructions
- Check for overhanging roofs, barbecue hoods, or security cameras that could interfere when the awning extends.
- Trim any low-hanging tree branches or vines that might brush against the fabric.
-
Foot Traffic & Activity Zones
- Map out how people move through your patio, deck, or yard. Avoid placing the awning in a way that forces detours or creates blind spots where someone could bump into poles or arms.
- If you have a hot tub, grill, or play area, ensure the projection does not encroach on these zones.
-
Existing Electrical or Home Features
- Locate any outdoor outlets, switches, or light fixtures near the mounting wall. Motorized or solar-powered models require wiring or panel installation — account for this in your layout.
- If you plan to integrate the awning with a home automation system, check where the control module will be installed relative to the mounting point.
-
Aesthetic & Color Coordination
- Think about the visual impact of your chosen fabric width and frame color. Pick a fabric pattern that complements your home’s exterior palette.
- Preview the awning’s footprint by marking the projected area with tape on the ground before purchase.
-
Future Maintenance Access
- Leave enough space around mechanical components, like the motor housing, to make maintenance or servicing easier down the line.
- If your roof has a gutter flush against the wall, ensure there is enough room to clear leaves or debris without detaching the awning.
Get Your Measurements Right & Enjoy Years of Shade!
Accurate awning sizing is the foundation of a successful installation and long-term enjoyment. By measuring your wall’s awning width, checking the actual fabric width, determining projection, verifying mounting height, and planning for solar panel placement, you’ll avoid common pitfalls and ensure a seamless fit.

What’s the Best TV to Use Outside?
Mastering Outdoor TV Installation: Your Complete Step-by-Step Guide