One common maintenance mistake that RV owners make is not taking the time to properly care for their air conditioning system. To keep the airflow cool and constant in your rig, especially on those scorching hot summer days, it’s important to keep an eye on your RV AC unit and inspect it regularly.
If you landed on this post, you may be wondering, “Why is my RV AC freezing up?” Great question! You more than likely have an airflow issue on your hands. The last thing you want to do is ignore the problem. When your air conditioner is stressed, it’s a good idea to immediately start troubleshooting the problem, otherwise you could end up with a premature AC failure. And that’s no fun in the summertime.
What Does It Mean for an Air Conditioner To “Freeze Up”?
Your RV air conditioner works by taking in the hot air from the inside of your RV and circulating it past an evaporator coil. As the refrigerant inside the evaporator coil converts to gas, heat from the indoor air is absorbed into the refrigerant, and the humidity condenses. The chilled air is then blown back into your RV while the condensed moisture is directed out of the AC unit.
If your air conditioner is in need of service or routine maintenance, this process may not go as smoothly as it should. The condensed humidity or moisture can actually freeze on the evaporator coil, limiting the coil’s ability to chill and expel the cooled air back into the room. This makes your system work in overdrive to keep the inside of your RV cool, which causes ice build-up. See how it’s all interconnected?
With this in mind, let’s take a look at the most common reasons your camper AC may be freezing up.
Common Problems that Cause Camper AC Freeze-Ups
Freeze-ups are more than likely the result of your AC unit getting poor or improper airflow. This can happen for a variety of reasons, including but not limited to:
-
Dirty evaporator and condenser coils
-
Dirty air filters
-
A poorly sealed or misaligned baffle (or flow divider)
-
Low refrigerant / coolant
-
A broken RV AC thermostat
-
High humidity
- An improperly sized unit
The good news is that each of these issues can be fixed if you follow the correct procedures. Read on to find out how you can fix these common camper freeze-up problems and how to avoid them in the future.

Camper AC Freeze-Up Problem #1:
Dirty Evaporator & Condenser Coils
The first step to ensuring your RV AC unit is getting proper airflow is to make sure your evaporator and condenser coils are clean. These coils are fundamentally important for proper AC function. If the coils are dirty, it is taxing for your unit to perform the heat exchange process efficiently. Keeping these coils clean ensures your air conditioner won’t overwork itself.
How to Clean RV AC Coils
Evaporator and condenser coils are located inside your rooftop air conditioner, underneath the shroud. You have to go a step further to get to the evaporator coils, as they are located underneath a sheet metal housing, plastic cover or a molded polystyrene foam cover. Even so, these coils are fairly easy to access and clean using the steps below.
You’ll need a screwdriver or screw gun, vacuum with a soft brush attachment, mild detergent mixed with warm water in a spray bottle and a soft-bristled brush or soft cloth.
Step 1: Shut off the AC unit
It’s extremely important to shut off your air conditioner to avoid injury while you tinker with the inner workings. Either unplug your RV from shore power, turn off your generator, then disconnect the batteries or turn off the breaker that leads to the air conditioner. Whichever method you choose, just make sure there isn’t any 12V or 110V power running to your AC.
Step 2: Remove the shroud
There should be a few screws that hold your rooftop air conditioning unit in place. Remove the screws using a screwdriver or screw gun and set them aside to remove the shroud. Now that the shroud is removed, you should be able to see the condenser coils and the sheet metal housing, plastic or polystyrene foam cover for the evaporator coils. Remove the housing or cover to gain access to the evaporator coils.
Step 3: Vacuum the coils
Block any openings that lead down into your RV. This will prevent dust, dirt and debris from wafting around inside your rig.
Then, using a soft brush vacuum attachment, gently vacuum around your coils being careful not to bend or break any of the aluminum components. Bent fins can lead to reduced cooling performance and efficiency! Also, exercise caution around the fins as they may be sharp.
Step 4: Clean the coils
While there are various air conditioner cleaning agents on the market, you can still get a good clean using a mild household detergent and warm water in a spray bottle. Use this mixture to spray down the coils and let them sit for a few minutes, giving the cleaner time to loosen any dirt or buildup. Next, use a soft, non-abrasive brush or cloth to wipe down each coil. For good measure, vacuum the coils again to pick up any debris that you knocked loose.
You may need to repeat this step multiple times if your condenser and evaporator coils were especially dirty due to lack of maintenance or environmental factors.
You'll also want to be mindful of temperature sensing bulbs and the thermistor freeze control sensor. Take note of their location, and make sure that they are clean using a soft bristle brush. The thermistor, if in the incorrect location, could cause evaporators to freeze up prematurely. In most cases, the thermistor should be in the fins of the evaporator, one inch from the bottom on the left side.
Step 5: Inspect all coils
Now that your coils are clean and you can see what you’re working with, it’s time for an inspection. As we mentioned above, bent aluminum fins can lead to poor AC efficiency, so you want to make sure you don’t have any bent, damaged or broken components inside your unit. If you notice you have some bent fins, you’ll want to purchase a fin straightener tool (usually $20 or less) to help reorient the fins in the correct direction.
Step 6: Reassemble the air conditioner
As long as all your coils are dry, you can reattach the sheet metal housing or cover for the evaporator coils. Before you get too enthusiastic about putting the shroud back on, it’s a great time to clean it! Using soap, water and a scrub brush or cloth, give the shroud a good clean, and dry it before reattaching it to the roof with the screws you set aside earlier. (Hopefully you didn’t lose them!)
Note: You might see that some insect friends have made a home inside your shroud. This is normal. Carefully remove any nests while you’re cleaning. It’s a good idea to regularly inspect your rooftop AC unit for these nests and remove them as necessary. Also, be sure to clean your air conditioner coils monthly if you use your RV full-time or seasonally if you’re a part-timer.
Camper AC Freeze-Up Problem #2:
Dirty Air Filters
Another common reason why your camper AC may be freezing up is dirty air filters. It all comes back to airflow. A dirty or clogged air filter inhibits how efficiently your air conditioner can push out cool air. To maintain cooling performance, you’ll want to clean or replace your air filter at least once per month.
How to Clean RV Air Conditioner Filters
There are basically two different types of air filters your unit can have: disposable and reusable / washable. Disposable air filters are easy to change out. All you need to do is purchase a new one that’s the correct size for your RV AC unit, swap it out with the old filter, then throw the old one away.
Reusable air filters require a few more steps but are also more sustainable than their disposable counterparts. Use the following step-by-step instructions for cleaning your dirty RV air conditioner filter. To get started, you’ll need a screwdriver, vacuum, cold water and a mild detergent or vinegar.

Step 1: Shut off the AC unit
The last thing you want is for dusty air to circulate through your AC unit and your RV. Shut off the air conditioner to avoid this.
Step 2: Remove the air filter
Using a screwdriver, loosen the screws on the rooftop air conditioner cover from inside your coach. This should expose the air filter enough for you to pop it out of place.
Note: Some filters are held in with a clip-in style access door. You can easily pop these out of place without tools.
Step 3: Clean the filter
If you’ve kept up with air conditioner maintenance, chances are your air filter just needs a light clean. Vacuum up any visible dust or debris, then use cold water and a mild detergent to clean the air filter. If your air filter needs a little more TLC, or there are signs of mold and mildew, you’ll want to break out the white vinegar for a deeper clean. Soak the air filter in a one-part vinegar, one-part water solution for no more than 30 minutes. Never use bleach!
Whichever way you choose to clean the filter, you’ll need to make sure you rinse it thoroughly with clean water after it’s been soaked in cleaning solution. For this step, feel free to use a sink faucet or hose, but never use a power washer — they are simply too strong for the delicate air filter material.
Step 4: Let it dry
You’ll want to make sure your air filter is completely dry before returning it to its housing. This may take several hours, so it’s best to do this overnight.
Step 5: Reinstall the filter
Return the filter to its housing, and reinstall the cover using screws and a screwdriver (or clip it back into place). Don’t forget to turn your AC system back on to enjoy clean, fresh air!
Camper AC Freeze-Up Problem #3:
A Poorly Sealed or Misaligned RV AC Baffle (Flow Divider)
A baffle, also called a flow divider, keeps the hot air and cold air in an AC unit separated. If this component is poorly sealed or misaligned, the cold air outlet could leak into the hot air inlet. This means that the AC unit will take the already-chilled air and try to cool it even further, causing ice to form. To fix this, simply reposition the baffle and seal it using HVAC foil tape.
Camper AC Freeze-Up Problem #4:
Low Refrigerant
Unless you have a leak somewhere, you shouldn’t be losing refrigerant, as this is not something you should be topping off regularly or can even get access to. If you think you have a refrigerant leak, we highly recommend getting your AC unit inspected by a professional.
Camper AC Freeze-Up Problem #5:
Broken Thermostat
You shouldn’t have to melt or freeze in your RV! Thermostats can go bad due to dust and wiring issues. If you have an older RV and notice that your air conditioner only works by constantly turning down the thermostat or your inside temperature doesn’t match your thermostat reading, it might be time for a replacement. This requires doing some minor electrical work, so if you aren’t comfortable handling a DIY electrical job, leave it to a professional.

Camper AC Freeze-Up Problem #6:
High Humidity
This is a factor that’s somewhat out of your control, so here’s what you need to know: your AC unit has to work extremely hard to keep up when there’s a lot of humidity in the air. In humid climates, the moisture in the air can overload your air conditioning system. If the fan is running on low, water can start to freeze on the coils.
To avoid this, run your fan on high so that the moisture has less time to settle on the coils and freeze over. You can also open your roof vents for limited amounts of time (no more than 20 minutes a few times a day) to help the hot air and moisture escape your RV.
If you love more humid climates like the Everglades in Florida and just can’t stay away, you may want to invest in a small dehumidifier. After all, spending the money on a dehumidifier is much cheaper than replacing a full rooftop air conditioner that got overloaded to the point of its untimely demise.
Camper AC Freeze-Up Problem #7:
Improperly Sized Unit
Lastly, the size of your RV AC unit should be determined by the size of your RV. A small unit installed in a large travel trailer or 5th wheel can take too long to cool down the entire space, and it might never fully get the job done. If you have too small of a unit installed on your RV, which isn’t likely unless you did an aftermarket install yourself, you could be creating an unnecessary draw on your power resources. You could also be overworking your AC unit which, as you’ve learned throughout this post, can cause an RV air conditioner to freeze up.
The fix for this is pretty straightforward: buy a bigger unit if you’ve tried everything else to no avail.
How to Defrost an AC Unit
So, now that you know why your camper AC is freezing up, let’s focus on how to defrost it. With just a few simple steps and a little bit of time, your RV’s air conditioner will be back up and running like normal!
- Remove the ceiling AC cover found on the inside of your RV using a screwdriver.
- Turn the air conditioner fan on and turn it up to its highest setting. Do not turn on the cooling setting. This should start to melt the ice, but it will take a few hours.
- Place a bucket on the floor underneath the unit to catch any water as the ice melts. You may want to spread out a towel underneath the bucket just in case the melting ice misses the bucket on the way down.
- Once the unit is fully defrosted, allow it to dry for several hours. It’s best to do this overnight.
- Reattach the AC cover and turn the unit to its cooling setting.
- Enjoy the fresh air as it starts to circulate back through your rig!
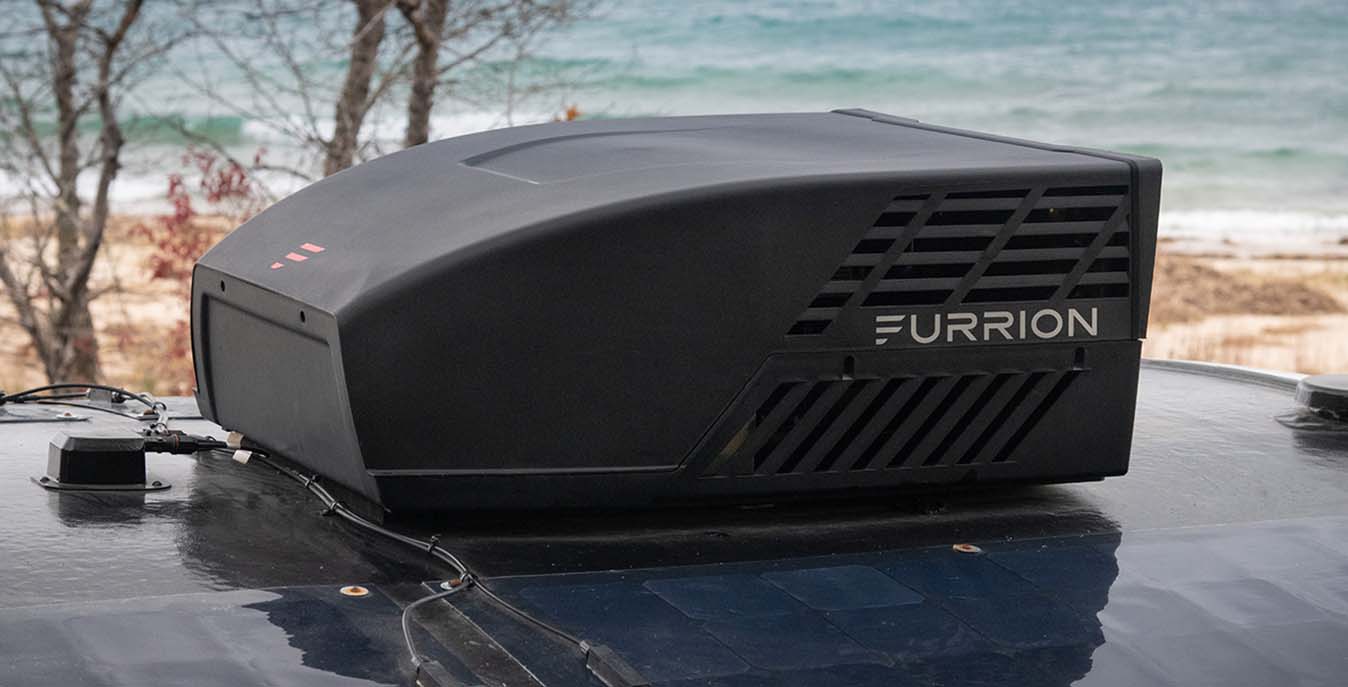
Why Furrion RV Air Conditioners Are Resilient to Freezing Up
The BTU output of an AC unit helps you understand its cooling performance. BTU stands for British Thermal Unit, and it's a measurement for energy. It takes one BTU to raise the temperature of a pound of water by 1°F, for example.
Many AC manufacturers claim a standard 13.5K or 15K BTU, but there are differences in their true cooling capacity. If you're traveling in warmer environments, you want the unit with the highest possible true cooling capacity.

Furrion Chill® air conditioners have up to 50% greater cooling capacity than leading competitors, which means you can cool faster and to lower temperatures. Additionally, these AC units automatically maintain the correct level of moisture in your air and can produce up to 25% dryer air than leading competitors. This creates a higher airflow cooling effect in summer and increases comfort.
The more efficient an AC unit is, the more cooling power you get. AC efficiency is measured in EER ratings; the higher the rating, the more efficient the unit is. For example, Furrion's 14.5K BTU AC uses the same or less power as many 13.5K BTU ACs. This means the AC doesn't need to run for as long to get the same cooling job done, saving on energy draw.
Shop RV air conditioning systems here!
Watch the Video to See How Furrion Air Conditioners Can Keep You Cool All Summer Long
Air Conditioner Troubleshooting
If you need additional help troubleshooting issues on your Furrion air conditioner, watch the below video from the Lippert Technical Institute.
How to Choose the Best RV Air Conditioner for Your Rig